Creating video content with Cadarn Resources

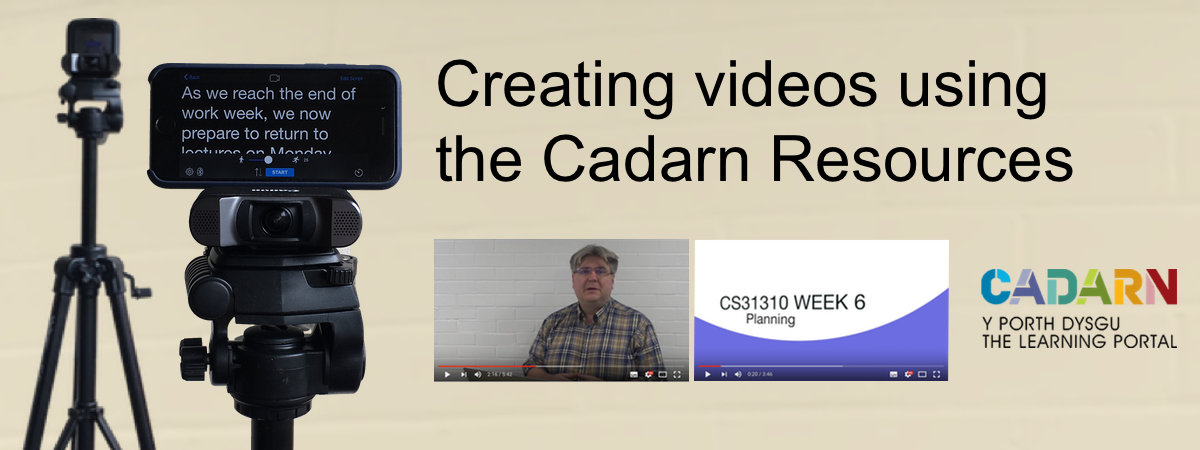
The Cadarn Learning Portal has different equipment available to help create videos. This equipment can be loaned from the Hugh Owen library. This article talks about the following items:
- Canon Legria Mini digital camera;
- Zoom H2n audio recorder;
- Røde Lavalier Microphone.
Other resources are available, but these are the ones that I have used.
Canon Legria Mini
The Canon Legria Mini is a handy camcorder that can be used to create videos. It has two levels of zoom - wide angle and close-up. There is a great introduction video for the Legria available from Cadarn's YouTube stream.
The Legria has fewer features than other cameras, such as the JVC camera that is also available for loan. However, it has some advantages when creating videos such as those I created for a course on Agile Methodologies at Aberystwyth University. It is compact and easy to put into a bag and take anywhere. Also, a particular aspect that I liked is that the camcorder is flat, which makes it really easy to put a device on it as a teleprompter. I have written more about that in a separate post.
Equipment in the bag
When you borrow the Legria from the library, you are given a bag with several items in it. There is a camera, which should also have a SD card to store the videos. There is a GorillaPod tripod, a charger for the battery and a USB cable. There is also a CD with software that can be used, although that software can also be accessed online.
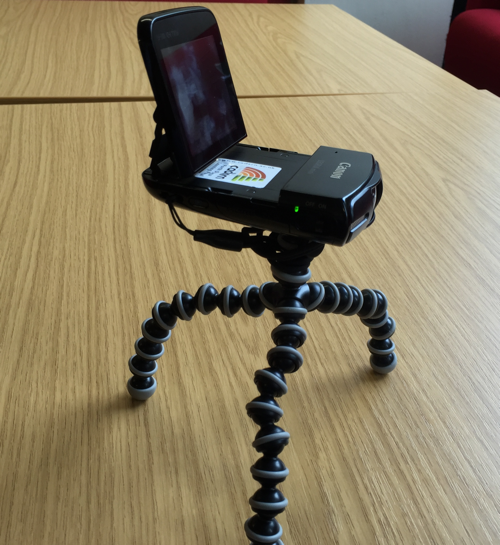
Legria mini mounted on the GorillaPod.
That is enough to get started. Personally, I didn't find the GorillaPod tripod that useful because it is quite small. I used my own tripod for most of the work that I did. However, the Gorilla tripod can be wrapped around other items, which means that could be used to mount the camera in some unusual places for some videos.
Positioning the camera
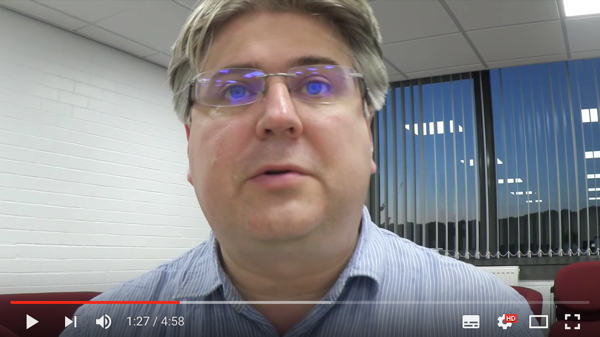
For the videos I shot, I used the close-up mode. In the first video, I ended up balancing the Legria and tripod on some books in order to get a reasonable height. I was sat close to the camera, and my face filled quite a lot of the screen. Some students quickly commented that they liked the idea of the videos, but suggested that I was too close, particularly when the video is viewed at full screen.
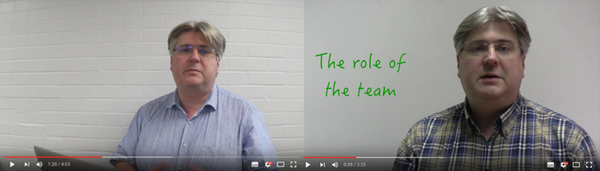
The feedback from the Cadarn team was also the I could fill less of the screen. Therefore, for future videos, I mounted the Legria on a tripod. It was positioned at a relatively short distance that meant I was occupying about 1/3 of the space on the video. Overall, I think this was better. Some examples from other videos are shown below.
Making and Reviewing Recordings
Starting a recording is easy. Set the zoom mode to either close or wide angle, using a button on the touch screen. Then, press the record button on the screen or the record button on the side of the camcorder. You then build up a list of recordings that you can access via USB when you later connect this to a computer.
The Legria can be used to review the recordings that you have made. There is a Play button, that switches the screen controls. Once in the Play mode, you can review recordings. The controls are all on the touch screen, so it is easy to access options to view the different clips, access information about the clips or even select and delete clips.
Zoom H2n Audio Recorder
The microphone on the Legria is very good. However, the audio might record more than you want if there are other noises near to where you are shooting the footage. To overcome that, I experimented with the Zoom H2n recorder.
The recorder fits easily in the hand. The user interface could be easier to use, but thankfully there aren't many controls that you need to get used to. The manual is helpful to get started. In my experience, I mostly used it to capture the audio and then transferred the recordings to my computer. I didn't use much of the extra functionality on the device.

Credit: Image linked in from Amazon.
Overall, I would say that it offered better quality audio. The Zoom has integrated microphones, with different options on how it can pick up audio around the device. I found that it offered a good audio level. However, on the recommendation of the staff at Cadarn, I used it with a clip-on microphone - this is discussed below.
There is only one Zoom H2n available for loan, so there have been some occasions when I haven't been able to access it. I recommend that you plan ahead if you want to use this.
Synchronising audio and video with the double clap
If you are shooting video with the Legria and capturing the sound with the Zoom, you have the problem of how to match the video and the audio together.
When recording video, you actually have two streams of information - the images (video stream) and the audio (audio stream). With a good video editor, it is easy to remove the audio from a video track and link in a different audio track. That still leaves open the question of how you synchronise the audio so that it matches the video.
The staff in Cadarn offered a handy tip. At the start of recording a clip, clap twice. Both the camcorder and audio recorder will record this sound. I used Apple's Final Cut Pro for video editing. Final Cut Pro has an option to synchronise a video stream and an audio stream. It is easy to for the software to do this where there is an obvious sound that is similar in both audio tracks.
Røde Lavalier Microphone
The final piece of Cadarn equipment that I used was a small lapel microphone. It plugs into the Zoom H2n as an alternative microphone source.
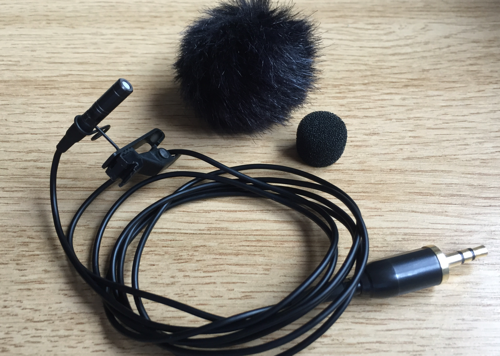
The lapel mic comes with a clip and two different types of head to put over the mic. The furry head is better for windy situations.
Clip the microphone onto yourself or the person you want to record. The recording is then controlled using the Zoom H2n.
This worked well. The main issue was where to put the Zoom device whilst talking. I did most of the recording inside, so it was possible to rest the Zoom on a desk next to me. For a recording session outside, you might hold the Zoom in your hands or put it in your pocket.
Accessing the footage
When you have a set of recordings, connect the Legria camera to your computer using USB. Canon provides software called ImageBrowser EX. There is a CD provided with the pack that should contain the program. The Legria instructions talk about installing that software and using it to transfer footage to your computer. If your computer doesn't have a CD Drive, then you can also access the program and documentation online at the Canon site for the Legria mini
You might not need to use the ImageBrowser EX. As mentioned above, I used Final Cut Pro for editing the video. Final Cut Pro can import directly from cameras that are plugged in via USB. It is worth checking if your video editing software can directly import the footage.
Final Cut Pro can also import audio recordings directly from the Zoom H2n when the Zoom is attached via USB. You should be able to browse the Zoom as a connected drive, but I didn't try that option. Check the Zoom H2n documentation for details.
Tidying up
Once you have shot the footage and are sure you have copied it to your computer, it is a good idea to delete the footage on the camera. It will make sure there is space for the next person using the device. Perhaps a more important reason is that you don't want to leave your outtakes ready for others to enjoy :-)
Borrowing the equipment
The Cadarn items are available for staff. You can find out about number of items available on the Equipment Loans list.
It is best to contact Information Services in advance to check the availability of the items you are interested in. The easiest way to do this is to email is@aber.ac.uk.
Acknowledgements
Thanks to the staff in Aberystwyth at Cadarn, the Learning Portal. Particular thanks to Russ Basford, who provided advice on getting started and some tips to improve later videos.